

How to Set Up an IPTV Box Step-by-Step (Beginner Guide)
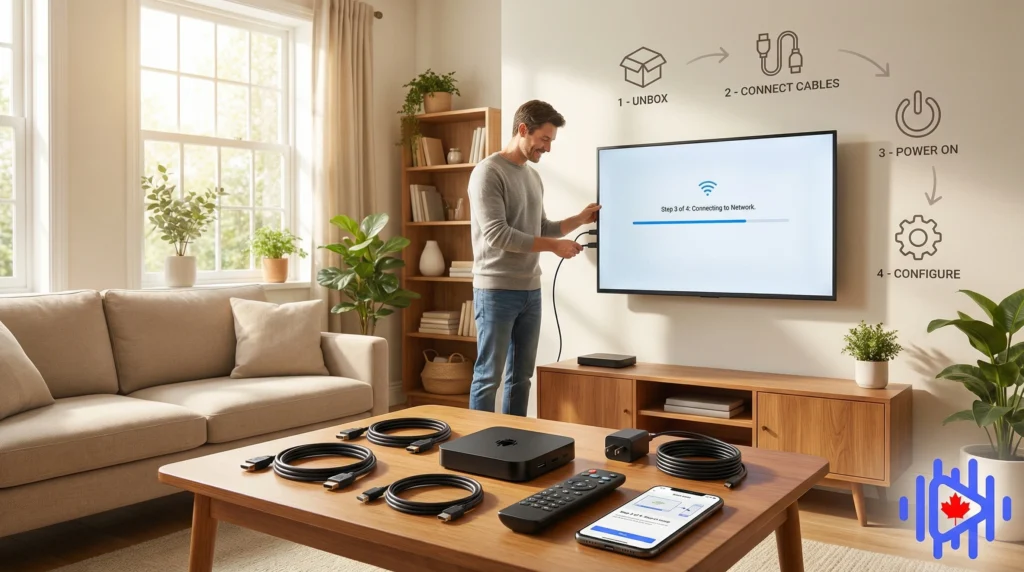
From unboxing to your first live channel in under 20 minutes. No technical background needed — just follow each step and you will be streaming in no time.
Getting started with IPTV can feel overwhelming when you are staring at a small box, a handful of cables, and a screen that shows absolutely nothing. Most IPTV guides you find online assume you already know what a playlist URL is or why the EPG matters. This one does not. If you have never set up an IPTV box before, you are in the right place.
Over the past few years, IPTV has replaced cable for a lot of households across Canada. The reason is straightforward: you pay a fraction of what cable costs, you get more IPTV channels, and you watch on whatever device is already plugged into your TV. The setup process, once you understand it, takes less than 20 minutes. The confusion usually comes from not knowing which steps go in which order.
This guide walks through everything from picking the right IPTV hardware to loading your first channel list. We will also cover the things people tend to skip — like checking your connection speed before you start, or understanding why certain apps work better than others depending on your device. Whether you are in Montreal, Toronto, or a small town outside Calgary, the process is the same. The only thing that changes is which channels you care about most.
If you are looking for a reliable provider to go with your new IPTV setup, IPTV services built for Canadian viewers will save you a lot of trouble when it comes to local channels, French-language content, and sports packages. More on that later. For now, let’s start with the hardware.
Check that your internet connection delivers at least 10 Mbps for HD streaming. If you are unsure, visit fast.com from your phone or laptop before touching the box. A slow connection will make even the best IP TV setup feel broken. Our guide on what internet speed IP TV actually needs breaks this down by content type and household size.
What Is an IPTV Box and How Does It Work
An IP TV box is a small device that connects to your TV and your home internet, then streams live television channels over that connection instead of through a cable or satellite dish. The “IP” in IPTV stands for Internet Protocol — the same technology your phone uses to load a webpage or stream a YouTube video. The box just applies that idea to live TV.
There are a few different types of hardware that can run IP TV. Understanding the difference before you buy saves a lot of frustration later. Each device type has its own app ecosystem, and some hardware handles 4K IPTV streams better than others at the same price point.
Devices like the Formuler Z11 or Nvidia Shield run the Android operating system. You install IPTV apps directly from the Play Store or via sideloading. These give you the most flexibility.
Purpose-built IP TV hardware that runs a stripped-down Linux system. They use a portal URL instead of an app. Simpler but less versatile than Android-based devices.
Amazon’s streaming stick plugged into your TV’s HDMI port. IPTV apps can be sideloaded easily. Affordable entry point that most people already own.
Popular streaming platform with limited native IP TV app support, but workarounds exist. Works best paired with specific IP TV apps available through the Roku Channel Store.
Many Samsung, LG, and Android TVs can run IPTV apps natively. No extra hardware needed if your TV’s operating system supports the right apps.
iOS and Android both support IPTV apps. Useful for testing or watching on the go, though most people want their main setup on the big screen.
For most beginners, an Android TV box or a Fire Stick is the easiest starting point. They give you access to apps, have good community support, and handle HD and 4K content without issue on a decent connection. If you want dedicated hardware specifically designed for IP TV, a MAG box is worth considering — though the setup process is slightly different from Android devices.
Try Before You Commit
Testing a provider before you wire everything up saves you from setting up a box around a service that does not deliver. Start with a free trial — no credit card needed — and confirm the channels you care about actually work on your connection.
Claim Free Trial →What You Need Before You Start
Running through a quick checklist before setup prevents the most common frustration: getting halfway through the process and realizing you are missing something. Here is what needs to be in place.
Wired ethernet is more reliable than WiFi, especially for live sports or 4K content. If you are using WiFi, make sure the box or stick is within a reasonable distance from your router. Walls and floors kill signal fast. For a full breakdown of what your speeds actually need to be, read our guide on internet speed requirements for IPTV in Canada.
After you subscribe to an IPTV service, you will receive either an M3U URL or an Xtream Codes login (a server address, username, and password). You need one of these to load your IPTV channel list into your app. Keep this information in your email or a notes app before you start — you will need it during setup.
Different devices use different apps. IPTV Smarters Pro and TiviMate work well on Android devices. GSE Smart IPTV covers iOS. Kodi works across almost everything. We will cover app installation for each device type in the steps below.
If you bought a dedicated Android TV box or MAG box, you will need an HDMI cable to connect it to your TV. Many boxes do not include one in the package. Fire Sticks and Roku sticks plug directly into the HDMI port, so no separate cable is needed for those.
Android TV boxes and Fire Sticks require you to sign in during initial setup. Have a Google account ready. If you do not have one, create one on your phone before starting — it takes about two minutes and you only do it once.
Before installing any IPTV app, run a speed test specifically from the device you plan to use — not from your laptop. The speeds can be dramatically different depending on where the device sits relative to your router. This single step prevents hours of troubleshooting later.
Step-by-Step IPTV Box Setup Process
The setup process has a few variations depending on your hardware. We will walk through the general flow first, then point you to device-specific guides for anything that differs.
Step 1: Connect Your Device to the TV
Plug your box into an available HDMI port on your TV. Switch the TV input to the correct HDMI source using your remote. If you are using a Fire Stick or Roku stick, it plugs directly into the port. For a standalone box like a Formuler or MAG, connect the HDMI cable between the box and your TV, then plug the power cable into the box.
If nothing appears on screen after plugging in, check that your TV is on the correct HDMI input. Most TVs have 2 to 4 HDMI ports. The input selector button on your remote — sometimes labeled “Source” or “Input” — cycles through them.
Step 2: Connect to Your Internet
On first boot, your device will walk you through initial setup. This usually includes selecting your language and connecting to WiFi. If you can run an ethernet cable from your router to the box, do it now. Most Android TV boxes have an ethernet port on the back. Wired connections eliminate a large category of buffering problems before they can start.
Not sure if your connection is fast enough? The guide on IPTV internet speed requirements covers exactly what you need for HD, FHD, and 4K streams.
Step 3: Sign In and Update Your Device
For Android TV boxes and Fire Sticks, you will need to sign in with a Google or Amazon account. Once signed in, go to the settings and check for system updates. Running older firmware creates compatibility problems with IPTV apps — this step saves you from chasing issues that do not actually exist in the current version of the software.
Step 4: Install Your IPTV App
This is where device type matters. Choose the path that matches your hardware:
For Android TV boxes running standard Android TV or Google TV, open the Play Store, search for your IPTV app of choice, and install it. IPTV Smarters Pro and TiviMate are the most widely used options with the best interface. For Fire Sticks, you will sideload the app since most IPTV apps are not available in the Amazon App Store — our Fire Stick IPTV installation guide covers this step by step.
If you bought a Formuler Z11 or a MAG box, the setup is slightly different because these devices use a portal-based system rather than a standard app. The full walkthrough is in our Formuler and MAG box setup guide. And for Roku users, the process involves a few workarounds that our Roku IPTV guide explains clearly.
Step 5: Enter Your IPTV Credentials
Open your IPTV app. Most apps will prompt you to add a playlist on first launch. You have two options depending on what your provider gave you:
- M3U URL method: Select “Add via M3U URL” or “Playlist URL” and paste the link your provider sent. The app will download your full channel list automatically.
- Xtream Codes method: Select “Xtream Codes login” and enter your server address, username, and password separately. This is more stable for large channel lists.
Wait for the playlist to load. Depending on how many channels your subscription includes, this can take anywhere from 30 seconds to a few minutes. Once it finishes, your channel list will appear.
Step 6: Configure Your EPG (TV Guide)
The EPG is the on-screen program guide that shows what is currently playing and what is coming up next on each channel. Without it, IPTV feels like cable from 1987 — you have to flip through channels blind. Most IPTV apps will import EPG data automatically when you load your playlist via Xtream Codes. If you loaded an M3U URL, you may need to enter an EPG URL separately in the app settings.
Our IPTV EPG guide explains exactly how the TV guide works and how to troubleshoot it when channels show “no information” instead of program names.
Step 7: Test Your Channels
Do not assume everything works just because the channel list loaded. Open at least five or six channels across different categories — news, sports, a local channel, and something in 4K if your subscription includes it. Let each stream run for 30 seconds to confirm it plays without freezing. If specific channels buffer while others do not, that is usually a stream quality issue on the provider side, not something wrong with your setup.
Choosing the Right Hardware: Device Comparison
If you have not bought a device yet, this table gives you a quick read on the trade-offs between the most common options. The right choice depends on how much you want to spend, whether you want a dedicated IPTV device or a general-purpose streamer, and how comfortable you are with slightly more involved setup steps.
| Device | Best For | App Flexibility | Setup Difficulty | Price Range |
|---|---|---|---|---|
| Formuler Z11 / MAG Box | Dedicated IPTV users | Limited | Moderate | $80 to $150 |
| Android TV Box | Flexibility seekers | High | Easy | $50 to $200 |
| Amazon Fire Stick | Budget-conscious beginners | Medium | Easy | $40 to $60 |
| Roku | Simple interface lovers | Low | Easy | $30 to $100 |
| Smart TV (built-in) | No extra hardware wanted | Varies | Easy | $0 (if TV supports it) |
The Fire Stick is probably the most practical starting point for someone who has never done this before. It is cheap, widely available, and the sideloading process — while slightly more involved than a standard app install — is well-documented. If you are already leaning toward serious IPTV use and want something purpose-built, a Formuler or similar Android box makes more sense long term.
Looking for IPTV in Quebec?
Quebec viewers need a service that actually delivers French-language channels: TVA, V Télé, Ici Radio-Canada, RDS, and more. Our IPTV Quebec packages are built with that in mind — tested, stable, and updated regularly for francophone content.
Explore Quebec Plans →Optimizing Your IPTV Setup After Installation
Getting the box running is step one. Getting it running well is a different conversation. A few settings adjustments after installation make a noticeable difference in daily experience.
Match Your Settings to Your Internet Speed
IPTV apps let you configure buffer sizes, stream quality preferences, and hardware decoding options. The IPTV defaults are rarely ideal for your specific connection. Someone on a 15 Mbps connection needs different IPTV settings than someone on 100 Mbps fiber. Our guide on optimizing IPTV settings for your internet speed covers exactly which settings to change and why, for both fast and slower connections.
Consider a VPN if You Notice Throttling
Some Canadian ISPs throttle IPTV traffic during peak hours. If your IPTV setup works fine late at night but buffers constantly between 7 and 10 PM, that is a strong signal your provider is shaping your traffic. A VPN encrypts your IPTV stream so the ISP cannot identify it as IPTV and throttle it. This is not a theoretical problem — it affects real IPTV users in cities across Canada regularly. Our article on whether you need a VPN for IPTV in Canada explains the mechanics and which situations actually warrant one.
According to research published by Broadband Search, ISP throttling disproportionately affects video streaming traffic during evening hours — precisely when most households are watching TV. This pattern is consistent across major North American providers and IPTV is not immune to it.
Set Up Your EPG Properly
A lot of people load their channel list and stop there, then wonder why the program guide shows nothing or shows the wrong information. EPG configuration is a separate step and it takes about five minutes. Once it is working, you get a proper TV guide with program names, descriptions, and schedules — which makes IPTV feel much closer to a traditional cable experience. Everything you need to know is in our IPTV EPG guide.
Keep Your App and Device Updated
IPTV apps release updates regularly to fix authentication issues, improve stream handling, and add features. Running an outdated version of your app is one of the most common reasons people experience problems that have actually already been fixed upstream. Set your device to notify you of app updates, or check manually once a month.
After finishing your initial setup, run five channels for about five minutes each and watch for any stutter or freezing. If one category of channels buffers consistently — for example, sports in HD — note which resolution and category it is. That narrows down whether it is a stream quality issue, a settings problem, or a connection issue, which saves you from guessing later.
Common Beginner Mistakes and How to Avoid Them
After watching a lot of first-time setup experiences, the same problems come up again and again. These are not complicated issues — they are just things no one told you to watch out for.
- Using WiFi when ethernet is available: Even a 2.4 GHz WiFi signal that tests fast on a phone can drop packets during live IPTV streams. If your IPTV box has an ethernet port and your router is within cable distance, use it. The difference is real.
- Not refreshing the playlist after subscribing: When you first enter your M3U URL or Xtream credentials, always force a full refresh. The app caches the channel list, and a partial or interrupted initial download causes channels to appear but not play.
- Installing too many IPTV apps at once: Testing multiple apps simultaneously confuses people about which one is actually working. Pick one, get it working fully, then evaluate alternatives if you want to. Running three IPTV apps at once just multiplies your troubleshooting surface.
- Ignoring provider differences between regions: Not all IPTV providers carry the same Canadian channels. A provider optimized for Toronto viewers may have weak French-language coverage. If you need both English and French IPTV content, verify the channel list before committing to a subscription.
- Skipping the EPG setup: This one is worth repeating. Without EPG data, you are navigating a list of channel numbers with no program information. It takes five minutes to configure and transforms the IPTV experience.
- Assuming buffering means the service is down: Buffering during a busy evening is almost always either an ISP throttling issue or a connection speed problem — not the IPTV service itself being down. The fix is usually a settings adjustment or a VPN, not a support ticket.
For a deeper look at what “service down” actually means versus a local connection issue, and how to tell them apart fast, the IPTV Canada status diagnostic guide walks through the full checklist.
Academic research from ResearchGate’s IPTV service performance studies consistently finds that the majority of user-reported “service failures” are attributable to local network conditions rather than provider infrastructure — which aligns with what we see in practice.
What to Set Up After Your Box Is Working
Once your basic setup is running and you have confirmed channels load properly, there are a few things worth configuring to get more out of your IPTV experience.
Organize Your Favorites
Most IPTV apps let you mark channels as favorites, which pulls them into a separate list so you are not scrolling through hundreds of IPTV channels to find the ten you actually watch. Spend ten minutes doing this right after setup and you will never have to do it again.
Enable Catch-Up if Your IPTV Provider Offers It
Catch-up is an IPTV feature that lets you watch content that aired in the past 24 to 72 hours, similar to how network apps work on your phone. Not every IPTV provider includes it, and not every app shows it in an obvious place. Check your IPTV app’s settings for “time-shift” or “catch-up” and enable it if available — it is worth using.
Set a Preferred IPTV Stream Quality
If your IPTV subscription includes multiple stream qualities (SD, HD, FHD, 4K), most apps let you set a default quality preference. For a fast connection, set it to HD or higher and let it run. For a slower connection, setting a default of SD or 720p prevents constant buffering while still giving you a watchable picture. The IPTV settings optimization guide covers this in more detail.
Learn Your IPTV App’s Keyboard Shortcuts
If you are using an IPTV box with a physical remote, learning two or three shortcuts saves you a lot of navigation time. Most IPTV apps let you jump back to the previous channel, open the mini-guide, or switch between categories with a single button. Check the app’s help section or look it up quickly on YouTube — it takes three minutes and you will use those shortcuts daily.
Ready to Start Streaming?
Your box is set up, your app is installed, and all that is left is picking the right provider. Our IPTV services cover 18,000+ channels, Canadian locals, sports packages, and French-language content — all on a single subscription. Try it free, no card required.
Start Free Trial →You Are Ready to Stream
Setting up an IPTV box for the first time is mostly about following the right order. Connect the hardware, get your device on the internet, install the right app, enter your credentials, configure the EPG, and test a handful of channels before you call it done. That is the whole process. None of it requires technical knowledge — just patience and the willingness to follow steps rather than skipping ahead.
The things that trip people up are almost always the same: skipping the connection speed check, ignoring the EPG setup, or trying to troubleshoot multiple apps at once. Avoid those three things and your first IPTV setup will go smoothly.
If you run into issues specific to your device, the guides for Formuler and MAG boxes, Fire Stick, and Roku cover the hardware-specific steps in detail. And if you are not sure whether your connection is ready, the internet speed guide gives you clear numbers to work with.
Whether you are setting up in Vancouver, setting up an IPTV box in Quebec, or anywhere else in Canada — the setup is the same. What changes is which channels matter to you. Pick a provider that actually covers them, test it first, and you will be watching in under 20 minutes.
